
Pergo Prodigy Installation
Pergo Installation
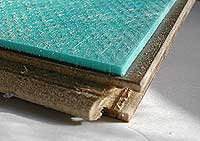
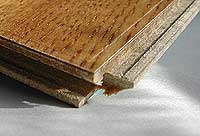
Compared to the other flooring the Prodigy is very easy to install. You still have the mind bending gymnastics of figuring out when, how, and what to cut but there's no glue or backing to mess with. Instead they have a slick little locking tongue and groove mechanism, as you can sort of see in the pictures below. You'll also note that the foam backing is already attached to the back of each plank.
Pergo Prodigy is installed using an interlocking row of boards with the next row locking into the previous one. It's a little tricky in that you have "locks" on both the left and front edge of the new plank you are laying.
Their method is to first interlock the smaller left edge, and then lift/push/pound the plank so its bigger front edge locks into place. It takes a little while to get the swing of it but it beats the hell out of glue and hammers.
For tricky spots I used an old scrap piece, locked it into an edge and then gently hammered. You don't want to hammer your main plank because it will mess up the edges (and your visible floor). Also the scrap should be large enough that when pounding it you don't dent the good plank.
The Prodigy has a 25 year warranty, the styles are pretty nice, and they've added texture to the surface so it doesn't look quite so fake. Obviously it's not real wood and therefore it's not a completely random surface pattern. But since the planks are larger and you are encouraged to stagger each row the repeating pattern isn't as obvious.
| «Introducing Prodigy | Page 3 of 5 | Visual Comparison» |